At the beginning of february it was finally on! Me and my comrade Alex were playing the Assault on Bunker Hill (actually Breed's Hill). For over a year I have been working on my new love child project, the American War of Independence from 1775 to 1783, and now the line-up of the first battle is ready. I started with Bunker Hill, because it is a very famous and iconic battle of the war, marking the start of allout warfare in the colonies after the "shot heard around the world" at Lexinton and Concord. Also it provides a good starting point to build up the forces for both sides and larger scenarios.
 |
| The Battlefield |
The opposing forces were the round-up of New England militia, which
later would become the core of the Continental Army, made up of a
Massachusetts brigade under Col. William Prescott and one from New Hampshire commanded by John Stark, against the British
regulars stationed in and sent out from Boston.
 |
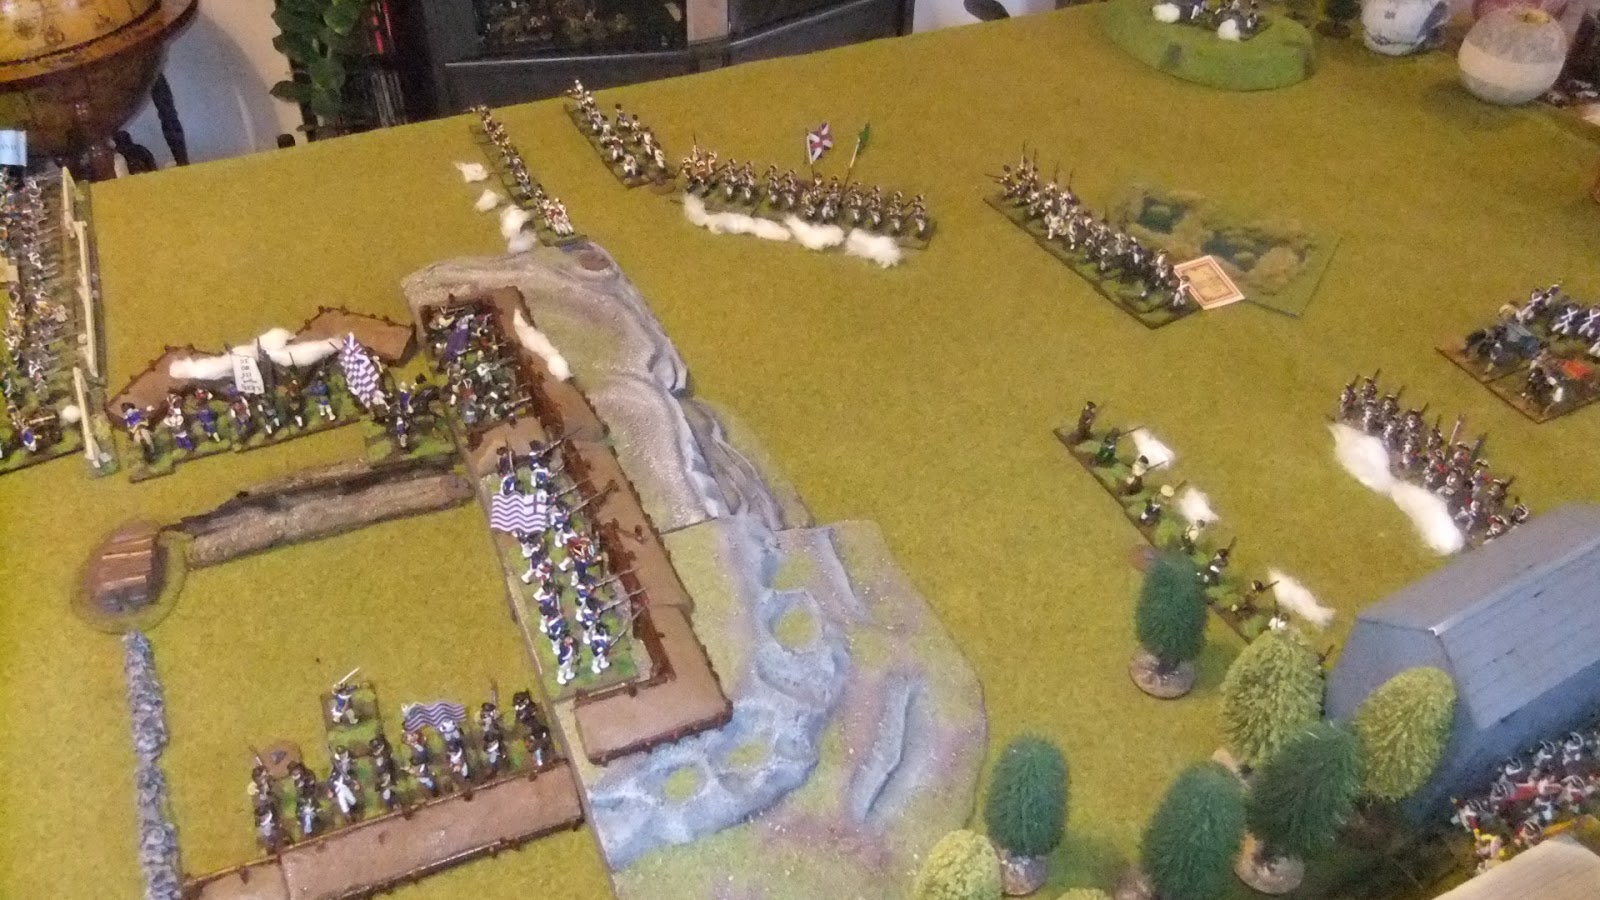
| American redoubt on Breed's Hill |
 |
| John Stark's Brigade behind the Rail Fence |
The British comprised three brigades, one under Howe with Grenadiers, Light Infantry, the 5th & 52nd Regiments as well as an 12 pdr artillery battery on Copp's Hill, another brigade under Brigadier-General Robert Pigot with the 38th and 55th Regiments plus a battery of 6 pounders, and last but not least, Lt.-Gen. Henry Clinton's 63rd and Marines arriving later on the day.
 |
| Howe's Brigade |
 |
| Pigot's Brigade |
And here are the overall Commanders-in-Chief on this 17th June 1775.
 |
| Major-General Israel Putnam |
 |
| Lieutenant-General Sir William Howe |
The Battle was a frontal assault by the British on the strongly fortified American positions on Breed's Hill. A risky endeavour indeed ,which predicted a lot of casualties, but was taken on for two reasons:
First, the British thought themselves superior, putting His Majesty's highly trained Regulars against a ragged bunch of colonial militiamen.
Second, Breed's Hill lies on the Charlestown Peninsular surrounding the north of Boston and the British commander of Boston, Lt.-Gen. Thomas Gage, feared the consequences of the rebels postioning artillery there. This would have enabled them to bombard Boston Harbour and the Royal Navy. Therefore this strong position had to be taken nonetheless.
 |
| The first wave attack begins |
 |
| A group of Skirmishers holds up Pigot's brigade |
 |
| Meanwhile on the right flank the firefight starts. |
A curiosity occured early on in the battle, as the British 12 pounders get a very good shot at the American Commander, which causes Gen. Putnam to flee from the battlefield, leaving Stark in charge . An extra ration of rum for the Royal Artillery, please!
 |
| 12 pounder guns on Copp's Hill |
 |
| Israel Putnam disgracefully fleeing, court martial to be followed. |
The 55th Regiment of Foot tried to charge the skirmishers, but changed their minds on the last inches and rather retreated. The caused a crash with the following artillery, leaving Robert Pigot in the role of a Bobby directing the traffic.
 |
| Pigot rallies traffic jam |
With Pigot's Brigade being stuck, it is up to General Howe to bravely lead his men in the frontal assault on the American redoubt, with the Grenadiers firing on Dolittle & Nixon's 4th Continental Regiment and the 5th/52nd closing in on Knowlton's militia. Meanwhile, the Light Bobs on the right flank keep up the firefight and face a counterattack from the 3rd New Hampshire Regiment.
 |
| Frontal Assault on the Redoubt |
 |
| 3rd NH counterattacks |
The British charge on the fieldworks is successful as the Militia can not stand the onslaught and retreat. Suddenly, the Regulars stand in the American redoubt, intending not to yield one foot backwards, while Col. Prescott desperately tries to rally his men.
 |
| The British have a breach! |
The other British regiments behave not nearly as glorious as their comrades in the 5th/52nd. The Grenadiers refuse to charge their side of the redoubt and the Light Infantry retreats from the 3rd NH's counterattack.
 |
| The Grenadiers halt |
 |
| Light Bobs retreat foot in hand. |
But help is on the way and lifts morale, as Henry Clinton's column of Marines (not Royal yet^^) and the 63rd Regiment of Foot arrives on the shores of Charlestown Peninsular, ready to take up the fight.
 |
| Clinton's force approaches the battlefield |
Looking to his left, he watches a military disaster: our poor traffic policeman Pigot had just rallied the 55th and ridden to direct the 38th on the left flank behind Charlestown, as the faltering Grenadiers retreat right into his brigade. This causes more disorder and another traffic jam with the artillery!
 |
| Grenadiers cause more traffic jam |
 |
| The 38th on the left flank |
Encouraged by necessity and the maneuver blunders of the rest of the British Army, the American militia tried to charge the 5th/52nd out of the redoubt with all their might, but in vane! Colonel Woodbridge's militia also retreats from the stout British soldiers holding the breach. They also drag the remainders of Gridley's 3 pounder battery with them. This leaves a hole in the American center, too big to stuff, therefore forcing the New England Army of Occupation to retire from Breed's Hill and across Charlestown Neck to safety.
 |
| American Militia and Ari retreat, giving victory to the British |
 |
| The 5th/52nd hold the breach and mock the routing Rebel rabble |
So, the outcome was very close to history, although not as bloody for the British, who in reality needed three waves, before the Americans routed due to running low on ammunition. Maybe the dilettantism and missing professional behaviour displayed on both sides in this game could be a reason for this.
This was our first game using the excellent "British Grenadier"-Rules by Eclaireur and I have to say, they are ideal for the AWI. The movement and firing mechanisms feels appropriate for warfare of this period. Also the "Disruption Points" (stone markers), which cover all kinds of disorder, from uneven terrain or false movement up to disorder by musketry fire, work really well. The first two rounds were slow, because we had to look up stuff in the rulebook a lot (first game, you know...) but afterwards the game was fast and flowing nicely. I am really looking foward to the next game and more scenarios.